내일배움단 App2.4
[앱개발 종합반] 2주 4일차 개발일지(2주 5강)
📱TIL App.204
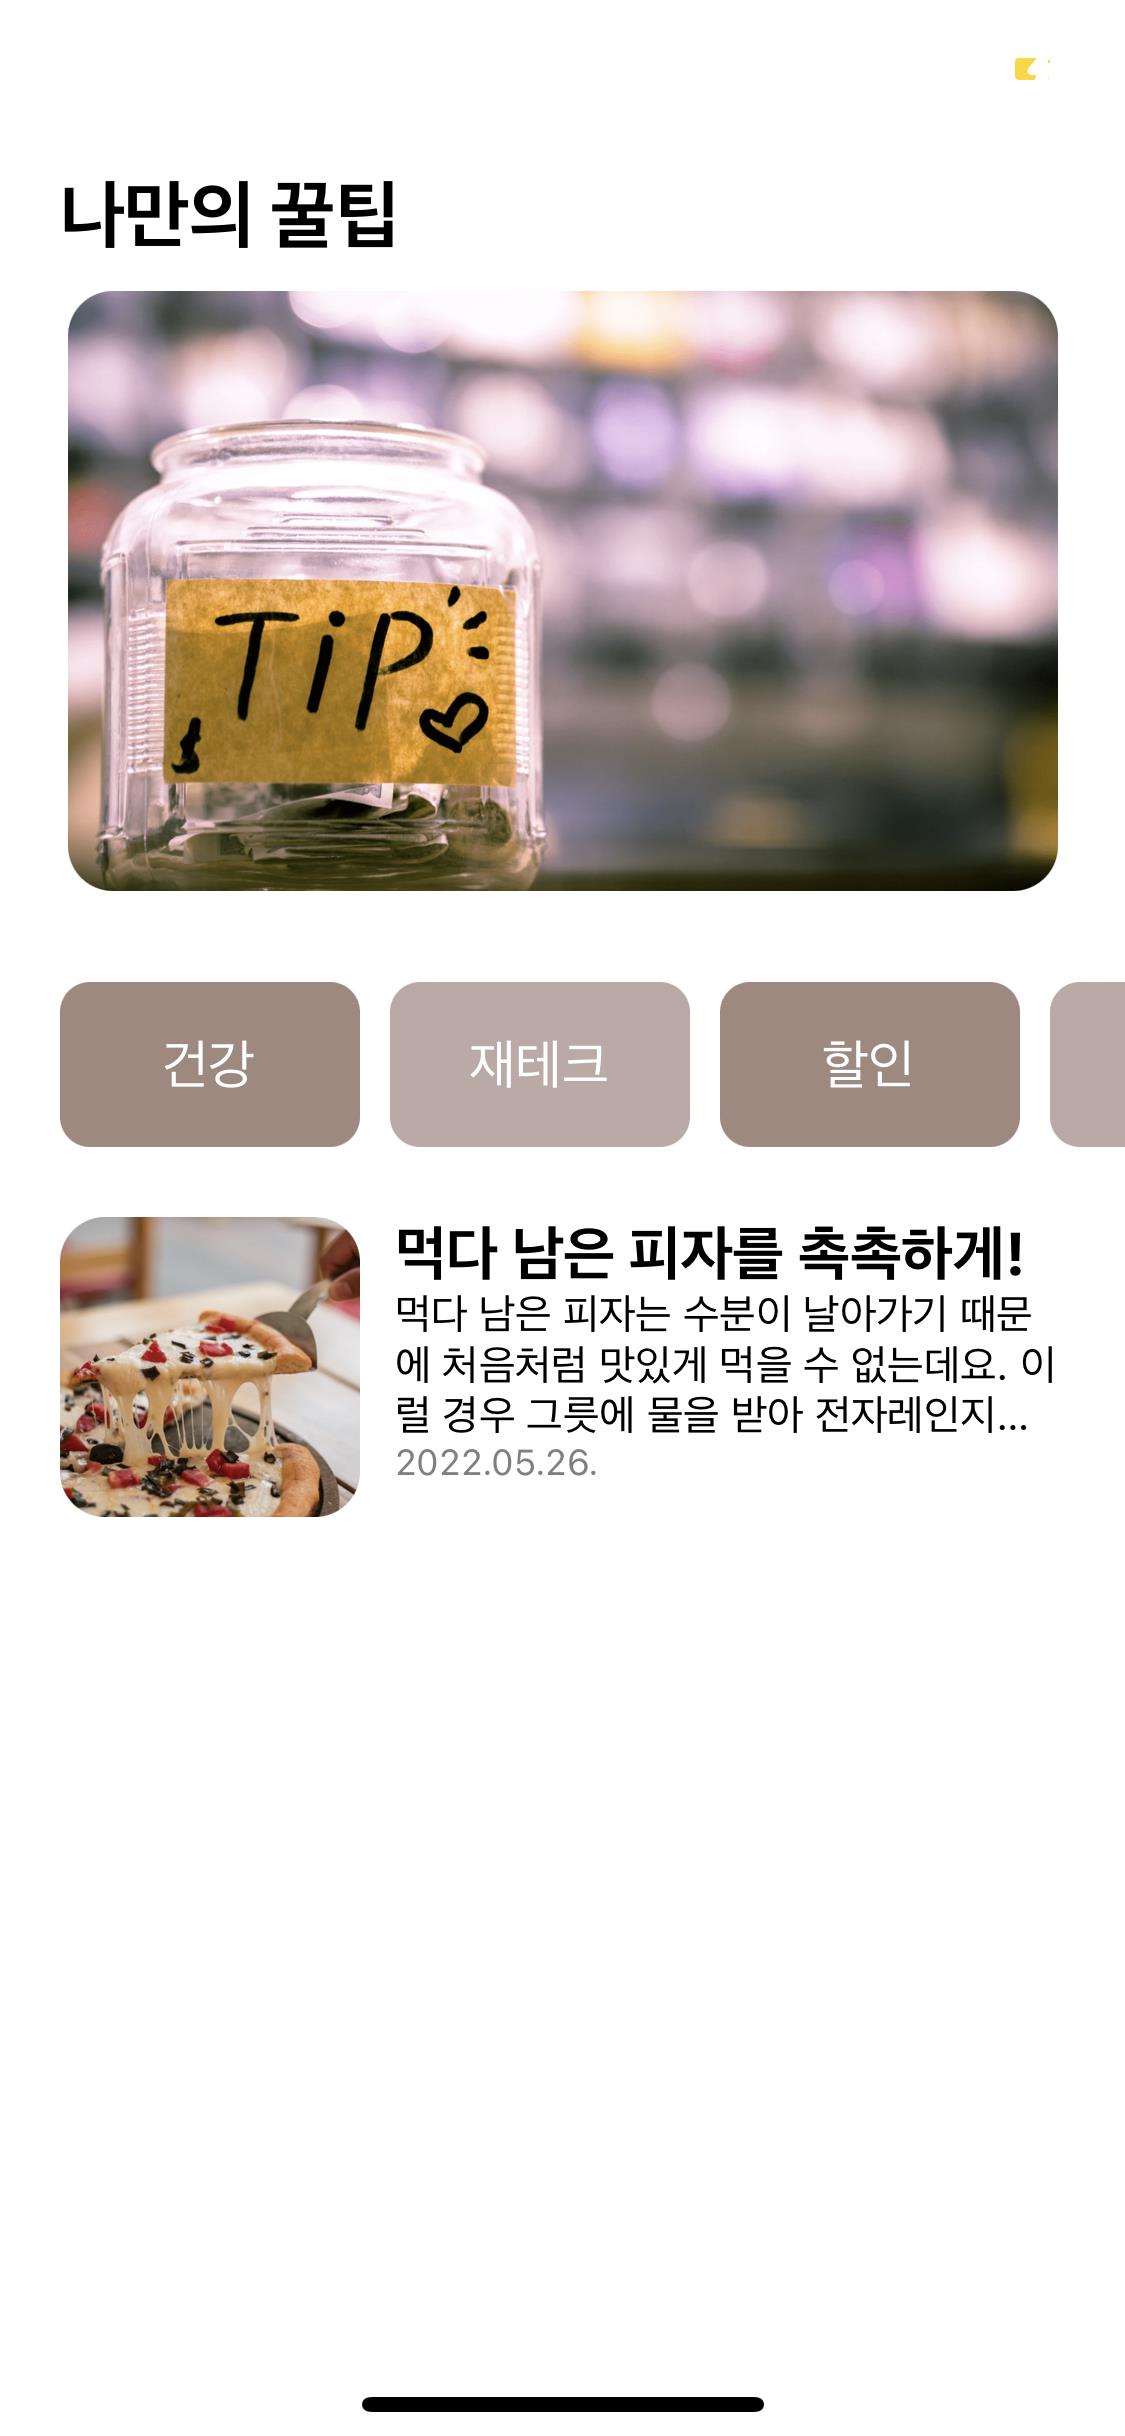
앱 화면 만들기: 메인화면 완성하기
1. 예시 이미지/나의 결과 이미지

2. 예시 이미지 보고 스스로 해보기(1차)
HTML, CSS로 웹 페이지를 만드는 것처럼, JSX 태그들로 큰 틀을 짜고 난 후 StyleSheet로 꾸며야 한다. 틀이 잘 잡혀야 자잘하게 꾸미는 일도 쉬워진다!
import React from 'react';
import { StyleSheet, Text, View, Image, ScrollView, Button, Alert } from 'react-native';
import main from "./assets/main.png"
import pizza from "./assets/pizza.png"

export default function App() {
  return (
    <View style={styles.container}>

      <View style={styles.titleContainer}>
        <Text style={styles.titleText}>나만의 꿀팁</Text>
        <View style={styles.titleImage}>
          <Image
          source={main}
          resizeMode={"cover"}
          style={styles.titleImageStyle}
          />
        </View>
      </View>

      <View style={styles.contentContainer}>
        <View style={styles.buttonContainer}>
          <ScrollView horizontal={true}>
            <View style={styles.button01}>
              <Button
                title="건강"
                color="#fff"
                onPress={function(){
                  Alert.alert('건강 관련 꿀팁!')
                }}
              />
            </View>
            <View style={styles.button02}>
              <Button
                title="재테크"
                color="#fff"
                onPress={function(){
                  Alert.alert('재테크 관련 꿀팁!')
                }}
              />
            </View>
            <View style={styles.button03}>
              <Button
                title="할인"
                color="#fff"
                onPress={function(){
                  Alert.alert('할인 관련 꿀팁!')
                }}
              />
            </View>
            <View style={styles.button04}>
              <Button
                title="생활"
                color="#fff"
                onPress={function(){
                  Alert.alert('생활 관련 꿀팁!')
                }}
              />
            </View>
          </ScrollView>
        </View>

        <View style={styles.articleContainer}>
          <View style={styles.article01}>
            <View>
              <Image
                source={pizza}
                resizeMode={"cover"}
                style={styles.articleImageStyle}
              />
            </View>
            <View style={styles.articleText}>
              <Text style={styles.articleTitleText}>먹다 남은 피자를 촉촉하게!</Text>
              <Text numberOfLines={3} ellipsizeMode='tail' style={styles.articleText}>먹다 남은 피자는 수분이 날아가기 때문에 처음처럼 맛있게 먹을 수 없는데요. 이럴 경우 그릇에 물을 받아 전자 레인지 안에서 1분 30초에서 2분 정도 함께 돌려주면 촉촉하게 먹을 수 있습니다. 물이 전자레인지 안에서 수증기를 일으키고, 피자에 촉촉함을 더해줍니다.</Text>
              <Text style={styles.articleDate}>2022.05.26.</Text>
            </View>
          </View>
        </View>
      </View>
    </View>
  );
}

const styles = StyleSheet.create({
  container: {
    flex: 1
  },
  titleContainer: {
    flex: 1,
    marginTop: 50,
    marginHorizontal: 20,
    justifyContent: "center"
  },
  contentContainer: {
    flex: 2
  },
  buttonContainer: {
    flex: 1,
    paddingLeft: 20,
    flexDirection: "row",
    alignItems: "center"
  },
  articleContainer: {
    flex: 4,
    marginHorizontal: 20
  },
  titleText: {
    fontSize: 23,
    fontWeight: "bold",
    marginBottom: 10,
    marginLeft: 5
  },
  titleImage: {
    justifyContent: "center",
    alignItems: "center"
  },
  titleImageStyle: {
    width: 330,
    height: 200,
    borderRadius: 15
  },
  button01: {
    justifyContent: "center",
    backgroundColor: "#a1887f",
    borderRadius: 10,
    width: 100,
    height: 60
  },
  button02: {
    justifyContent: "center",
    backgroundColor: "#bcaaa4",
    borderRadius: 10,
    marginLeft: 10,
    width: 100,
    height: 60
  },
  button03: {
    justifyContent: "center",
    backgroundColor: "#a1887f",
    borderRadius: 10,
    marginLeft: 10,
    width: 100,
    height: 60
  },
  button04: {
    justifyContent: "center",
    backgroundColor: "#bcaaa4",
    borderRadius: 10,
    marginLeft: 10,
    width: 100,
    height: 60
  },
  article01: {
    flexDirection: "row"
  },
  articleImageStyle: {
    width: 100,
    height: 100,
    borderRadius: 15,
    marginRight: 10
  },
  articleTitleText: {
    fontSize: 20,
    fontWeight: "bold"
  },
  articleText: {
    flexShrink: 1
  },
  articleDate: {
    fontSize: 12,
    color: "gray"
  }
});
3. 🤔 QnA
☑️ 버튼에 배경색을 주고 싶은데 <Button> 태그의 color 속성으로는 글자밖에 변하지 않는다.
✅ Button 공식 문서를 보니, <Button> 태그의 color 속성은 안드로이드에서는 배경색, iOS에서는 글자색을 지정한다고 한다. 버튼의 배경색을 지정하기 위해 <Button> 태그를 <View> 태그로 감싼 뒤, <View> 태그에 스타일로 backgroundColor 속성을 주었다.
☑️ buttonContainer의 flexDirection을 row로 설정했는데 영역 내 컨텐츠인 버튼들이 세로로 정렬되어 있다.
✅ 스크롤을 가능하게 하기 위해서 buttonContainer에 <ScrollView> 태그를 사용했는데, 이게 문제였나 보다. 일반 <View> 태그로 바꾸고 나니 row 설정이 적용되어 가로 정렬이 되었다.
☑️ 버튼이 있는 영역을 가운데 정렬하기 위해 <ScrollView> 태그의 스타일에 justifyContent="center"를 줬는데 ‘Render Error: ScrollView child layout ([“alignItems”,”justifyContent”]) must be appliled through the contentContainerStyle prop.’라는 에러가 떴다.
✅ 자세히는 모르겠지만, <ScrollView> 태그에 정렬 속성을 줄 수 없다는 뜻인 것 같다. <ScrollView> 태그를 감싸는 <View> 태그를 새로 만들어서 스타일에 justifyContent="center"를 주었더니 에러가 해결되었다.
☑️ <ScrollView> 태그를 이용해 좌우 스크롤을 주기 위해서는?
✅ ScrollView 공식 문서의 속성(Props) 부분을 보니, alwaysBounceHorizontal이라는 속성이 있었다. <ScrollView> 태그 안에서 horizontal={true}를 주면 좌우 방향(수평)으로 스크롤이 가능하다고 되어 있다.
☑️ padding 속성을 줄 때, CSS처럼 padding: 20 0를 이용해 상하/좌우를 한꺼번에 주려고 했는데 ‘Unexpected Token’이라는 에러가 뜬다.
✅ padding 공식 문서를 살펴보니, padding 속성에 하나의 값을 입력했을 때 상하좌우 모두 같은 값이 적용되는 것은 CSS와 동일했다. 다만 React Native는 축약형은 사용하지 않는다. 대신 상하, 좌우 padding 값을 각각 paddingHorizontal과 paddingVertical이라는 속성으로 줄 수 있다. margin도 동일한 방식으로 marginHorizontal, marginVertical로 상하, 좌우 값을 묶어서 줄 수 있다.
☑️ <Text> 태그에서 글이 자동으로 줄바꿈되도록 하려면?
✅ StackOverflow 사이트에서 flexWrap과 alignItems를 이용하는 방법, 그리고 flexShrink라는 속성을 발견해서 공식 문서를 찾아보았다.
① flexWrap은 자식 태그가 컨테이너의 사이즈를 벗어났을 때(overflow)의 배치를 지정하는 속성이다. 기본값(default)에서는, 자식 태그의 컨텐츠들이 한 줄로 정렬된다. wrap이 허용될 때에는, 컨텐츠들이 여러 줄로 묶인다. 줄을 여러 줄로 묶을 때(wrap)에는, alignContent를 사용해 컨테이너 안에 줄들이 어떻게 위치하는지 지정할 수 있다. flexWrap 속성을 찾아보니, wrap, nowrap, wrap-reverse의 세 값을 가지며, 줄바꿈을 위해서는 alignItems: flex-start를 사용해야 한다고 나와 있다.
② flexShrink는 자식 태그의 내용들이 컨테이너를 벗어날 경우(overflow), 자식 태그를 부모 태그의 영역에 맞게 줄여주는 속성이다. 기본값(default value)으로 0을 가지며, 이 경우 내부 컨텐츠들이 자동으로 줄어들지 않고 본 크기를 유지한다. 0보다 큰 정수를 입력하면 레이아웃 영역에 맞게 크기가 줄어든다. 보통 1의 값을 준다.
// X
articleText: {
  flexWrap: "wrap",
  alignItems: "flex-start"
}

// O
articleText: {
  flexShrink: 1
},
처음에는 flexWrap과 alignItems를 사용했는데, 내가 설정한 영역 밖으로 텍스트가 나와서 잘리는 현상이 발생했다. 차선책으로 flexShrink를 이용했더니 영역 안으로 들어오면서, 내가 설정한 높이까지만 줄바꿈이 되고 그 이후 내용은 보이지 않도록 조정되었다.
☑️ 텍스트가 3줄 이상이 되었을 때 자동으로 …(말줄임표) 처리되도록 하려면?
✅ 구글링을 해 봤더니 Grepper 사이트에서 아래의 예시 코드를 볼 수 있었다. 스타일에 속성을 지정하는 것이 아니라, 태그 안에 줄 개수와 tail이라는 값을 줬다. 공식 문서에 따르면, ellipsizeMode 속성은 numberOfLines가 정해졌을 때, 텍스트가 어떻게 잘릴지를 정하는 속성이라고 한다. head, middle, tail, clip의 네 가지 값을 가질 수 있다.
<Text numberOfLines={1} ellipsizeMode='tail'></Text>
4. 가이드라인 듣고 코드 수정하기(2차)
해설 강의를 듣기 전, 앞부분 가이드라인을 듣고 수정할 사항을 반영해 보았다.
1️) <Button> 태그 대신 <TouchableOpacity> 태그를 이용하자. 두 태그의 차이는 고유한 영역을 가지냐 아니냐의 차이인데, 앞에서 두 태그들에 대해 배울 때 <TouchableOpacity>를 더 자주 이용할 것이라고 했었다. 웬만하면 <TouchableOpacity> 태그를 이용하는 습관을 들이자! <TouchableOpacity> 태그는 <Button> 태그와 달리 title 속성이 없기 때문에, 안에 텍스트를 넣으려면 <Text> 태그를 자식 태그로 설정해야 한다. 또, 영역 안의 텍스트 스타일 또한 따로 지정해야 한다.
// 수정 전
<View style={styles.button01}>
  <Button
    title="건강"
    color="#fff"
    onPress={function(){
      Alert.alert('건강 관련 꿀팁!')
    }}
  />
</View>

button01: {
  justifyContent: "center",
  backgroundColor: "#a1887f",
  borderRadius: 10,
  width: 100,
  height: 55
}

// 수정 후
<TouchableOpacity style={styles.button01}>
  <Text style={styles.buttonText}>건강</Text>
</TouchableOpacity>

buttonText: {
  color: "#fff",
  fontSize: 18
},
button01: {
  justifyContent: "center",
  alignItems: "center",
  backgroundColor: "#a1887f",
  borderRadius: 10,
  width: 100,
  height: 55
}
2️) 버튼 아래 사진과 제목, 텍스트가 들어가는 부분을 flex 처리하면 좋을 것 같다고 하셨다. 사진이 들어가는 영역, 텍스트가 들어가는 영역의 비율을 설정해보자. 수정하다 보니 style 변수 이름이 겹쳐 새로 지정해 주었다. 수정하면서 코드를 새로 보니 생각보다 구조적으로 고칠 부분이 많았다.
// 수정 전
<View style={styles.article01}>
  <View>
    <Image
      source={{uri:"https://storage.googleapis.com/sparta-image.appspot.com/lecture/pizza.png"}}
      resizeMode={"cover"}
      style={styles.articleImageStyle}
    />
  </View>
  <View style={styles.articleText}>
    <Text style={styles.articleTitleText}>먹다 남은 피자를 촉촉하게!</Text>
    <Text numberOfLines={3} ellipsizeMode='tail' style={styles.articleText}>먹다 남은 피자는 수분이 날아가기 때문에 처음처럼 맛있게 먹을 수 없는데요. 이럴 경우 그릇에 물을 받아 전자 레인지 안에서 1분 30초에서 2분 정도 함께 돌려주면 촉촉하게 먹을 수 있습니다. 물이 전자레인지 안에서 수증기를 일으키고, 피자에 촉촉함을 더해줍니다.</Text>
    <Text style={styles.articleDate}>2022.05.26.</Text>
  </View>
</View>

article01: {
  flexDirection: "row"
},
articleImageStyle: {
  width: 100,
  height: 100,
  borderRadius: 15,
  marginRight: 10
}


// 수정 후
<View style={styles.articleContainer}>
  <View style={styles.articleImage}>
    <Image
      source={{uri: 'https://storage.googleapis.com/sparta-image.appspot.com/lecture/pizza.png'}}
      resizeMode={"cover"}
      style={styles.articleImageStyle}
    />
  </View>
  <View style={styles.articleText}>
    <Text style={styles.articleTitleText}>먹다 남은 피자를 촉촉하게!</Text>
    <Text numberOfLines={3} ellipsizeMode='tail' style={styles.articleSubtext}>먹다 남은 피자는 수분이 날아가기 때문에 처음처럼 맛있게 먹을 수 없는데요. 이럴 경우 그릇에 물을 받아 전자레인지 안에서 1분 30초에서 2분 정도 함께 돌려주면 촉촉하게 먹을 수 있습니다. 물이 전자레인지 안에서 수증기를 일으키고, 피자에 촉촉함을 더해줍니다.</Text>
    <Text style={styles.articleDate}>2022.05.26.</Text>
  </View>
</View>

articleContainer: {
  flex: 4,
  flexDirection: "row",
  marginHorizontal: 20
},
articleImage: {
  flex: 1
},
articleImageStyle: {
  width: 100,
  height: 100,
  borderRadius: 15,
  marginRight: 10
},
articleText: {
  flex: 2
}
- 수정된 최종 코드
import React from 'react';
import { StyleSheet, Text, View, Image, ScrollView, TouchableOpacity } from 'react-native';
import main from "./assets/main.png"
import pizza from "./assets/pizza.png"

export default function App() {
  return (
    <View style={styles.container}>

      <View style={styles.titleContainer}>
        <Text style={styles.titleText}>나만의 꿀팁</Text>
        <View style={styles.titleImage}>
          <Image
          source={main}
          resizeMode={"cover"}
          style={styles.titleImageStyle}
          />
        </View>
      </View>

      <View style={styles.contentContainer}>
        <View style={styles.buttonContainer}>
          <ScrollView horizontal={true}>
            <TouchableOpacity style={styles.button01}>
              <Text style={styles.buttonText}>건강</Text>
            </TouchableOpacity>
            <TouchableOpacity style={styles.button02}>
              <Text style={styles.buttonText}>재테크</Text>
            </TouchableOpacity>
            <TouchableOpacity style={styles.button03}>
              <Text style={styles.buttonText}>할인</Text>
            </TouchableOpacity>
            <TouchableOpacity style={styles.button04}>
              <Text style={styles.buttonText}>생활</Text>
            </TouchableOpacity>
          </ScrollView>
        </View>

        <View style={styles.articleContainer}>
          <View style={styles.articleImage}>
            <Image
              source={pizza}
              resizeMode={"cover"}
              style={styles.articleImageStyle}
            />
          </View>
          <View style={styles.articleText}>
            <Text style={styles.articleTitleText}>먹다 남은 피자를 촉촉하게!</Text>
            <Text numberOfLines={3} ellipsizeMode='tail' style={styles.articleSubtext}>먹다 남은 피자는 수분이 날아가기 때문에 처음처럼 맛있게 먹을 수 없는데요. 이럴 경우 그릇에 물을 받아 전자레인지 안에서 1분 30초에서 2분 정도 함께 돌려주면 촉촉하게 먹을 수 있습니다. 물이 전자레인지 안에서 수증기를 일으키고, 피자에 촉촉함을 더해줍니다.</Text>
            <Text style={styles.articleDate}>2022.05.26.</Text>
          </View>
        </View>
      </View>
    </View>
  );
}

const styles = StyleSheet.create({
  container: {
    flex: 1
  },
  titleContainer: {
    flex: 1,
    marginTop: 50,
    marginHorizontal: 20,
    justifyContent: "center"
  },
  contentContainer: {
    flex: 2
  },
  buttonContainer: {
    flex: 1,
    paddingLeft: 20,
    flexDirection: "row",
    alignItems: "center"
  },
  articleContainer: {
    flex: 4,
    flexDirection: "row",
    marginHorizontal: 20
  },
  titleText: {
    fontSize: 25,
    fontWeight: "bold",
    marginBottom: 10
  },
  titleImage: {
    justifyContent: "center",
    alignItems: "center"
  },
  titleImageStyle: {
    width: 330,
    height: 200,
    borderRadius: 15
  },
  buttonText: {
    color: "#fff",
    fontSize: 18
  },
  button01: {
    justifyContent: "center",
    alignItems: "center",
    backgroundColor: "#a1887f",
    borderRadius: 10,
    width: 100,
    height: 55
  },
  button02: {
    justifyContent: "center",
    alignItems: "center",
    backgroundColor: "#bcaaa4",
    borderRadius: 10,
    marginLeft: 10,
    width: 100,
    height: 55
  },
  button03: {
    justifyContent: "center",
    alignItems: "center",
    backgroundColor: "#a1887f",
    borderRadius: 10,
    marginLeft: 10,
    width: 100,
    height: 55
  },
  button04: {
    justifyContent: "center",
    alignItems: "center",
    backgroundColor: "#bcaaa4",
    borderRadius: 10,
    marginLeft: 10,
    width: 100,
    height: 55
  },
  articleImage: {
    flex: 1
  },
  articleImageStyle: {
    width: 100,
    height: 100,
    borderRadius: 15,
    marginRight: 10
  },
  articleText: {
    flex: 2
  },
  articleTitleText: {
    fontSize: 20,
    fontWeight: "bold"
  },
  articleSubtext: {
    flexShrink: 1
  },
  articleDate: {
    fontSize: 12,
    color: "gray"
  }
});
5. 해설 코드와 배울 점
import React from 'react';
import main from './assets/main.png';
import { StyleSheet, Text, View, Image, TouchableOpacity, ScrollView } from 'react-native';

export default function App() {
  console.disableYellowBox = true;
  return (
    <ScrollView style={styles.container}>
      <Text style={styles.title}>나만의 꿀팁</Text>
      <Image style={styles.mainImage} source={main}/>
      <ScrollView style={styles.middleContainer} horizontal indicatorStyle={"white"}>
        <TouchableOpacity style={styles.middleButton01}><Text style={styles.middleButtonText}>생활</Text></TouchableOpacity>
        <TouchableOpacity style={styles.middleButton02}><Text style={styles.middleButtonText}>재테크</Text></TouchableOpacity>
        <TouchableOpacity style={styles.middleButton03}><Text style={styles.middleButtonText}>반려견</Text></TouchableOpacity>
        <TouchableOpacity style={styles.middleButton04}><Text style={styles.middleButtonText}>꿀팁 찜</Text></TouchableOpacity>
      </ScrollView>

      <View style={styles.cardContainer}>
        {/* 하나의 카드 영역을 나타내는 View */}
        <View style={styles.card}>
          <Image style={styles.cardImage} source={{uri:"https://firebasestorage.googleapis.com/v0/b/sparta-image.appspot.com/o/lecture%2Fpizza.png?alt=media&token=1a099927-d818-45d4-b48a-7906fd0d2ad3"}} />
          <View style={styles.cardText}>
            <Text style={styles.cardTitle}>먹다 남은 피자를 촉촉하게!</Text>
            <Text style={styles.cardDesc} numberOfLines={3}>먹다 남은 피자는 수분이 날아가기 때문에 처음처럼 맛있게 먹을 수 없는데요. 이럴 경우 그릇에 물을 받아 전자레인지 안에서 1분 30초에서 2분 정도 함께 돌려주면 촉촉하게 먹을 수 있습니다. 물이 전자레인지 안에서 수증기를 일으키고, 피자에 촉촉함을 더해줍니다.</Text>
            <Text style={styles.cardDate}>2020.09.09</Text>
          </View>
        </View>
      </View>
    </ScrollView>
  );
}

const styles = StyleSheet.create({
  container: {
    backgroundColor: '#fff',
  },
  title: {
    fontSize: 20,
    fontWeight: '700',
    marginTop:50,
    marginLeft:20
  },
  mainImage: {
    width:'90%',
    height:200,
    borderRadius:10,
    marginTop:20,
    alignSelf:"center"
  },
  middleContainer:{
    marginTop:20,
    marginLeft:10,
    height:60
  },
  middleButton01: {
    width:100,
    height:50,
    padding:15,
    backgroundColor:"#fdc453",
    borderRadius:15,
    margin:7
  },
  middleButton02: {
    width:100,
    height:50,
    padding:15,
    backgroundColor:"#fe8d6f",
    borderRadius:15,
    margin:7
  },
  middleButton03: {
    width:100,
    height:50,
    padding:15,
    backgroundColor:"#9adbc5",
    borderRadius:15,
    margin:7
  },
  middleButton04: {
    width:100,
    height:50,
    padding:15,
    backgroundColor:"#f886a8",
    borderRadius:15,
    margin:7
  },
  middleButtonText: {
    color:"#fff",
    fontWeight:"700",
    textAlign:"center"
  },
  cardContainer: {
    marginTop:10,
    marginLeft:10
  },
  card:{
    flex:1,
    flexDirection:"row",
    margin:10,
    borderBottomWidth:0.5,
    borderBottomColor:"#eee",
    paddingBottom:10
  },
  cardImage: {
    flex:1,
    width:100,
    height:100,
    borderRadius:10,
  },
  cardText: {
    flex:2,
    flexDirection:"column",
    marginLeft:10,
  },
  cardTitle: {
    fontSize:20,
    fontWeight:"700"
  },
  cardDesc: {
    fontSize:15
  },
  cardDate: {
    fontSize:10,
    color:"#A6A6A6"
  }
});
① App.js의 기본 구조
import React from 'react';
import { StyleSheet, Text, View, Image, TouchableOpacity, ScrollView} from 'react-native';

export default function App() {
  console.disableYellowBox = true;
  return ()

}

const styles = StyleSheet.create({})
필요한 도구들을 import 해오는 코드, App 함수와 StyleSheet 함수 구조는 어느 화면을 만들 때에나 동일하게 적용되는 틀이다. 이 틀을 그대로 복사 붙여넣기하고 코딩을 시작하면, 원하는 코드만 입력하면 되기 때문에 편리하게 개발을 시작할 수 있다. 만약 assets 폴더의 이미지를 이용하고자 한다면 코드 상단에 해당 이미지도 import해와야 한다. 이미지를 assets 폴더에 다운로드하거나 저장하면 폴더에서 이미지를 바로 불러올 수 있다.
② 전체를 감싸는 태그, container
튜터분께서 화면 아래로 계속해서 리스트가 추가될 것이기 때문에, 전체를 감싸는 태그를 <ScrollView>(기본값 상하 스크롤)로 설정하셨다. 충격. 추후에 각 버튼을 누를 때마다 해당 카테고리의 리스트가 나오게 한다면, 꿀팁 부분의 영역만 <ScrollView> 처리해도 좋을 것 같다.
③ Image의 크기 지정
이미지의 너비와 높이를 각각 width와 height 속성에서 숫자로 줄 수도 있지만, 퍼센트로 줄 수도 있다. 단 width: "90%"처럼 문자열 형태로 값을 줘야 한다. 화면의 90%만 차지한다는 뜻. 서로 다른 기기에서 화면을 볼 때는 정해진 픽셀 크기보다는 퍼센트 값을 이용하는 것이 더 범용성이 클 것 같다.
④ 가운데 정렬과 flex의 관계, alignSelf
justifyContent, alignItems 속성을 사용할 때는 해당 영역이 flex안에 있어야 한다. CSS도 똑같다. 책에서 ‘부모 태그만이 flex할 수 있다’라고 했는데, 일단 flex 설정을 해야 내부 컨텐츠(자식 태그)에서의 정렬이 가능했다. 대신, alignSelf 속성을 사용하면 flex 영역이 아니더라도 컨텐츠 영역 자체를 정렬시킬 수 있다.
⑤ <View> 태그는 필요한 곳에만
튜터분과 내 스타일 차이인지도 모르겠지만, 강의를 듣고 보니 내가 모든 구역을 너무 세세하게 나누려고 한 것 같다. 기본적인 <Text>나 <Image> 태그는 굳이 감싸는 <View> 태그를 주지 않아도 충분히 style로 영역을 줄 수 있다. 내가 전체 구조를 생각하고 태그들을 구조에 맞게 끼워넣으려고 했다면, 튜터분께서는 필요한 태그부터 넣고 스타일을 바로바로 주면서 코드의 길이를 최소화하시는 것 같았다. 디자이너가 준 이미지가 있다면, 이것저것 넣어보면서 이미지와 비슷하게 만들어나가는 것도 하나의 접근 방식이라고 하셨다. 프론트엔드는 내가 작성한 코드가 눈에 바로바로 보인다는 장점이 있는 만큼, 이를 최대한 활용하면서 코드를 작성하자!
⑥ 투명한 영역 가시화하기
<TouchableOpacity> 태그 같은 경우에는 눈에 영역의 크기가 잘 보이지 않는다. 이러한 경우 borderWidth 속성을 숫자로 주면 해당 영역에 경계선이 생긴다. 나는 backgroundColor를 이용했는데, borderWidth 속성도 자주 이용하게 될 것 같다.
⑦ 텍스트 정렬, textAlign
나는 텍스트를 담고 있는 버튼 자체에 justifyContent와 alignItems 속성값을 모두 center로 줘서 텍스트를 가운데 정렬시켰지만, 텍스트 태그 자체에 textAlign: center 속성을 주면 텍스트를 중앙 정렬할 수 있다. 다만 공식 문서를 살펴보니, textAlign 속성은 텍스트의 가로 정렬만 설정이 가능하다. 텍스트의 세로 정렬은 textAlignVertical이라는 속성으로 설정 가능하다(안드로이드에서만 가능). 나는 textAlign을 사용했는데도 iOS 기기에서는 세로 정렬이 되지 않아서 <TouchableOpacity> 태그에 justifyContent와 alignItems 속성을 모두 center로 줬다.
⑧ 미래지향적 코드
②에서 전체 화면을 <ScrollView> 태그 처리한 것과 비슷하게, 튜터분께서는 나중에 리스트들이 추가될 것을 고려해서 각 리스트를 <View> 태그로 감쌌다. 이번은 처음이라 구현된 화면만 코드로 작성했지만, 앞으로는 화면이 어떻게 사용될지 생각해보고 코드를 짜보자!
⑨ Image가 눈에 보이려면
Image 태그가 눈에 보이려면 width나 height와 같이 영역을 지정하거나, flex로 영역을 줘야 한다.
⑩ 텍스트 3줄 이상일 경우 말줄임표
처음 스스로 코드를 짤 때는 영어로 ‘말줄임표’를 어떤 키워드로 검색해야 할지 고민했는데, 공식 문서에서 ‘line’을 키워드로 검색하니 ellipsizeMode와 numberOfLines 속성이 나왔다. ‘ellipsis’는 ‘생략’ 또는 생략 부호(…)의 뜻을 가진다. 두 속성은 자주 함께 이용되지만, numberOfLines 속성만 입력해도 말줄임표까지 생성되었다.
Leave a comment